 By admin
 What if you could create a dessert so incredibly decadent, combining the irresistible duo of chocolate and peanut butter, that it leaves everyone speechless – all with shockingly little effort? Get ready to unleash the magic of our Peanut Butter Cup Dump Cake, a dessert that’s not just easy but an absolute flavor explosion. Whether you’re planning a party or just need a quick, satisfying sweet fix, this cake is destined to become your go-to showstopper. Prepare to amaze your taste buds and impress your guests with this unbelievably simple recipe!
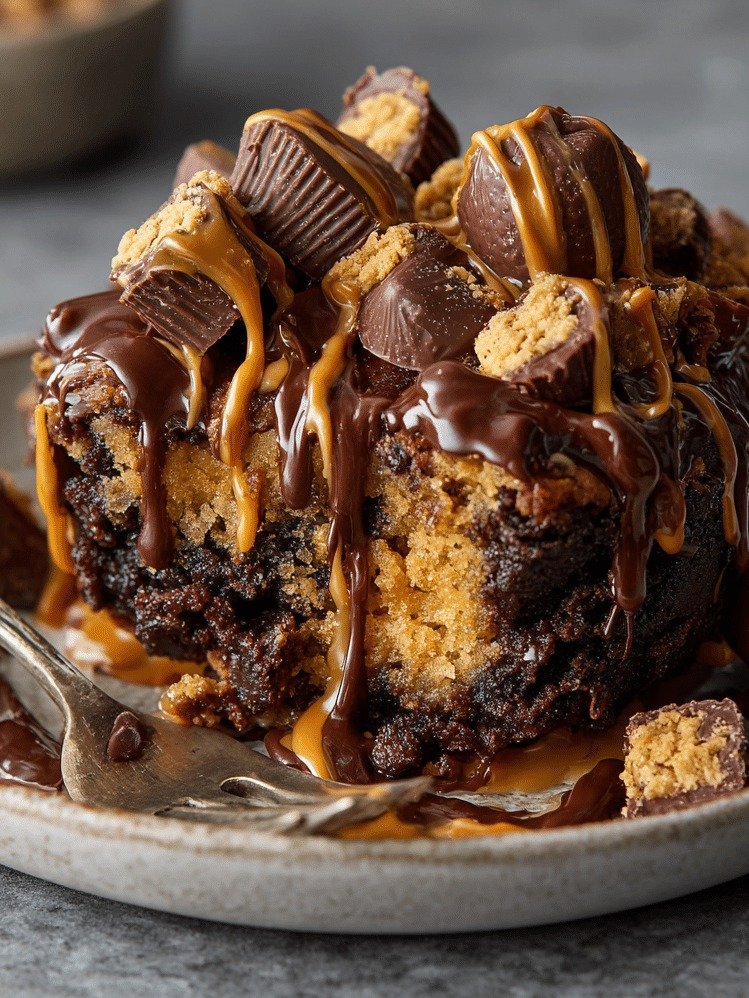
Ingredients:
- 1 (15.25 oz) box chocolate cake mix
- 1 (3.4 oz) box chocolate instant pudding mix
- 1 ¾ cups milk
- 1 (8 oz) package mini Reese’s PB Cups, chopped
Directions:
- First things first, get your oven ready by preheating it to a cozy 350 degrees Fahrenheit. Then, grab a 13×9 inch baking dish and give it a good spray with non-stick cooking spray; this little step is key for a seamless cake release later.
- Next, in a spacious mixing bowl, pour in the milk and add the chocolate instant pudding mix. Whisk this combination with enthusiasm until the pudding powder completely dissolves, transforming into a perfectly smooth and uniform liquid.
- Now, introduce the chocolate cake mix to your pudding mixture. Stir everything together until all the ingredients are beautifully blended. You’ll notice the batter taking on a wonderfully thick and luxurious consistency, a delicious preview of the moist and rich cake to come.
- Carefully fold in those delightful chopped mini Reese’s Peanut Butter Cups. Make sure they’re evenly dispersed throughout the batter so that every single forkful promises a fantastic explosion of creamy peanut butter nestled within that decadent chocolate foundation.
- Transfer the luscious batter into your greased baking dish, using a spatula to gently spread it out from edge to edge. This ensures that each piece you cut will be uniformly portioned and consistently delicious.
- Slide your baking dish into the preheated oven and let it bake for about 25 minutes. You’ll know it’s ready when a toothpick poked into the very center emerges clean. Get ready for your kitchen to be enveloped in the most divine, mouth-watering scent of chocolate and peanut butter as this cake bakes to golden perfection.
- As soon as your cake is baked, carefully take it out of the oven and let it cool down a bit before you slice into it. This dessert is fantastic whether you enjoy it warm, right after it’s cooled, or at room temperature; every bite delivers an incredible harmony of flavors that will undoubtedly have you reaching for another.
- To truly elevate your Peanut Butter Cup Dump Cake, serve it with a generous dollop of fluffy whipped cream or a scoop of creamy vanilla ice cream for an ultimate indulgent experience. For that extra wow factor, sprinkle a few more chopped Reese’s Peanut Butter Cups on top as a delightful and impressive garnish.
Serving and Storage Tips:
- Serving Suggestions: When it’s time to present your incredible Peanut Butter Cup Dump Cake, think about enhancing it with a luxurious drizzle of warm chocolate sauce or a delicate dusting of powdered sugar for an elevated touch. For a contrasting burst of fresh flavor that perfectly balances the cake’s richness, a handful of vibrant fresh berries like raspberries or strawberries makes a truly delightful pairing.
- Warm or Room Temperature: This cake is absolutely divine served warm, fresh from the oven, but it holds its own beautifully at room temperature too. Should you find yourself with any delicious leftovers, simply cover the entire baking dish snugly with aluminum foil, or move individual slices into an airtight container for safekeeping.
- Reheating Instructions: Craving that fresh-baked warmth again? For single slices, a quick zap in the microwave for a few seconds will do the trick. If you’re reheating multiple slices or prefer an oven-fresh feel, warm them in a preheated oven at 350 degrees Fahrenheit for approximately 5-7 minutes. This method perfectly revives the cake’s tender texture and gently melts those peanut butter cups, promising an even gooier, more irresistible bite.
- Storage: To keep your Peanut Butter Cup Dump Cake fresh, store any remaining portions in the refrigerator for up to 3-4 days. It’s crucial to cover the cake tightly with plastic wrap or transfer it to an airtight container to lock in moisture and prevent it from drying out. For extended enjoyment, this cake freezes beautifully for up to 2-3 months. Just wrap individual slices securely in plastic wrap, then place them inside a freezer-safe container or a resealable plastic bag. When you’re ready to enjoy, simply thaw them overnight in the refrigerator before warming or serving.
- Enjoying Leftovers: Never let a single crumb of this delicious cake go uneaten! Leftovers make a fantastic breakfast treat paired with your morning coffee or tea, or an unexpected yet delightful pick-me-up packed in a lunchbox. Feeling adventurous? Transform any remaining slices into exciting new desserts like a layered trifle, a elegant parfait, or even fun cake pops!
Variations:
- Nutty Twist: Craving an added layer of texture and a richer nutty aroma? Stir in some finely chopped peanuts or almonds directly into the cake batter before it goes into the oven. For a beautiful finish and an extra crunch, a sprinkle of additional chopped nuts on top just before serving makes a wonderful garnish.
- Salted Caramel Drizzle: Elevate your Peanut Butter Cup Dump Cake to an entirely new dimension by generously drizzling warm salted caramel sauce over each slice right before you serve it. The exquisite balance of sweet and salty notes will dance on your palate, adding an irresistible, complex depth of flavor that’s truly unforgettable.
- Double Chocolate Delight: For those who simply can’t get enough chocolate, intensify the cocoa experience by folding extra chocolate chips or chunks into the cake batter right alongside those peanut butter cups. This simple addition promises an ultra-rich, deeply decadent dessert designed to conquer even the fiercest chocolate cravings.
- Cookie Crumble Topping: Inject a playful new texture by scattering crushed chocolate sandwich cookies or fine chocolate wafer crumbs over the top of your cake before it bakes. This creates a wonderfully crunchy layer and infuses every mouthful with a delightful hint of cookie goodness.
- Marshmallow Fluff Swirl: Transform your cake into an even gooier, more indulgent delight by gently swirling spoonfuls of marshmallow fluff into the batter before baking. As the cake bakes, the marshmallow will melt and create incredible pockets of sweet, airy deliciousness throughout every slice.
- Frozen Peanut Butter Cups: For an unexpected and refreshing element, try incorporating frozen peanut butter cups instead of room-temperature chopped ones into your cake batter. These chilled cups will maintain their delightful firmness, providing a wonderful textural contrast against the warm, soft, and gooey cake when it’s served.
FAQs:
- Can I use a different flavor of cake mix for this recipe?
- Absolutely! While the classic chocolate cake mix beautifully enhances the peanut butter cups, don’t hesitate to get creative. Feel free to experiment with other delightful flavors like vanilla, a rich devil’s food, or even a decadent chocolate fudge mix to tailor the taste to your preference.
- Can I use regular-sized peanut butter cups instead of mini ones?
- Yes, you can certainly swap out the mini peanut butter cups for their regular-sized counterparts. Just be sure to chop them into smaller, bite-sized pieces to guarantee they disperse beautifully and evenly throughout the cake batter.
- Is it necessary to use instant pudding mix?
- While the instant pudding mix plays a crucial role in boosting the cake’s incredible moistness and tender texture, it’s not strictly mandatory. If you choose to skip it, you can still prepare the cake with just the cake mix and milk. Do keep in mind, however, that the final cake might be marginally less moist, though still utterly delicious.
- Can I make this cake gluten-free?
- Indeed, crafting a gluten-free version of this cake is entirely possible! Simply opt for a gluten-free chocolate cake mix and double-check that all other components, including your pudding mix and peanut butter cups, are certified gluten-free. Always remember to scrutinize product labels for confirmation.
- How should I store leftovers?
- For optimal freshness, any remaining cake should be kept in an airtight container within the refrigerator for 3-4 days. If you’re looking for longer-term storage, individual slices can be tightly wrapped in plastic wrap and then placed in a freezer-safe container, where they’ll stay delicious for up to 2-3 months.
- Can I make this cake ahead of time?
- Absolutely! This cake is perfect for preparing in advance. Once baked, simply store it in the refrigerator. When you’re ready to serve, just let it come to room temperature or give it a gentle warming for that fresh-baked feel.
- Can I omit the milk and use water instead?
- While using milk undeniably contributes to the cake’s rich flavor and moist texture, you can certainly substitute it with water if needed. Just be aware that this alteration might result in a slightly different overall texture and taste profile.
- Can I use a different type of chocolate candy instead of peanut butter cups?
- Without a doubt! Unleash your creativity and feel free to swap out the peanut butter cups for other beloved chocolate candies. Think chopped chocolate bars, classic chocolate chips, or even decadent caramel-filled chocolates to craft your own unique and delicious twist.
Imagine, in under 30 minutes, you can conjure up a dessert masterpiece that flawlessly marries the beloved flavors of chocolate and peanut butter. Thanks to its remarkable simplicity and utterly irresistible taste, this Peanut Butter Cup Dump Cake is destined to earn a permanent spot in your collection of go-to recipes. Go ahead, indulge yourself and those you cherish with this supremely decadent treat, and let every single heavenly bite transport you to a realm of pure chocolatey, peanut buttery bliss!