 By admin
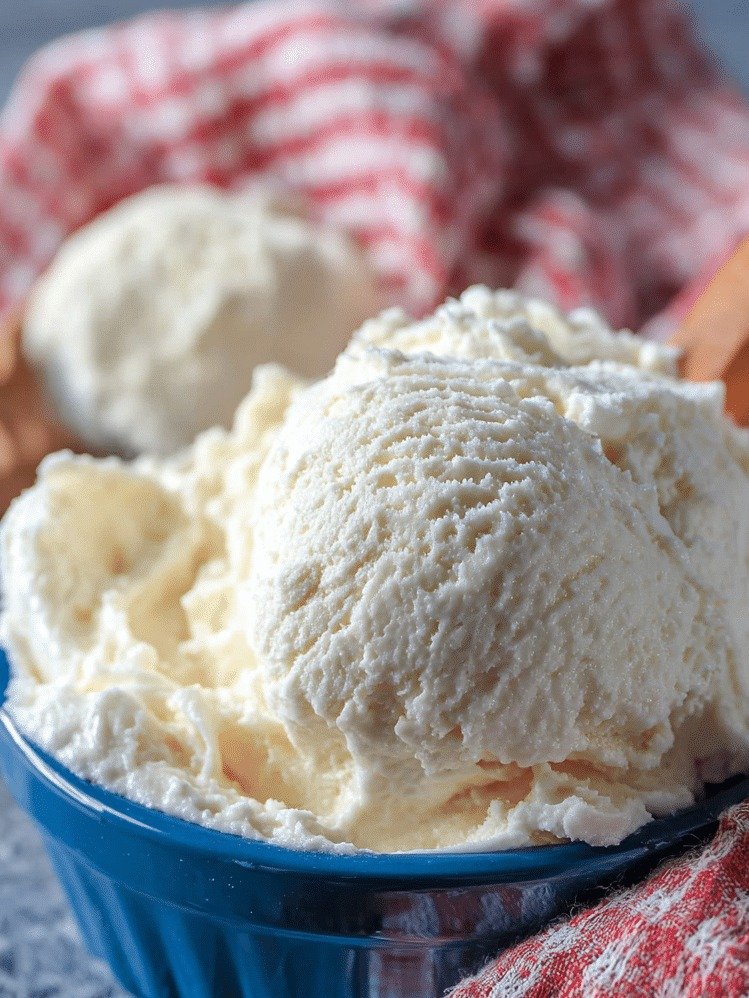
 What if I told you that crafting your own unbelievably rich, creamy, and utterly delicious homemade ice cream doesn’t require a bulky, expensive machine? It’s true! Forget everything you thought you knew about making frozen desserts, because with just a handful of basic ingredients and one of our surprisingly simple techniques, you can whip up gourmet-quality ice cream right in your own kitchen. Prepare to unlock a world of endless flavor possibilities, from the lightning-fast two-ingredient marvel to classic freeze-and-stir magic.
Ingredients
2-Ingredient Method
- 2 cups chilled heavy cream
- 1 (14-ounce) can chilled sweetened condensed milk
- 1/2 teaspoon vanilla extract
Freeze & Stir / Plastic Bag / Food Processor Methods
- 1 1/4 cups chilled whole milk
- 3/4 cup granulated sugar
- 2 cups chilled heavy cream
- 1 tablespoon vanilla extract
- 1/4 teaspoon fine sea salt
Instructions
2-Ingredient Method
- This method is unbelievably simple and delivers incredibly smooth, rich ice cream. First, in a large, chilled bowl, whip the heavy cream until it forms beautiful, stiff peaks.
- Next, gently fold in the chilled sweetened condensed milk and vanilla extract using a low speed on your mixer, or by hand, until just combined.
- This is your base for endless creativity – now’s the time to stir in any extra flavorings or delicious mix-ins you desire!
- Finally, carefully spoon the mixture into a sturdy freezer-safe container.
- For best results and to prevent ice crystals, press a layer of plastic wrap directly onto the surface of the ice cream.
- Then, secure the lid tightly.
- Pop it into the freezer for a minimum of 6 hours, or until it’s perfectly firm and scoopable.
Freeze & Stir Method
- This classic technique ensures a wonderfully smooth texture by regularly breaking up ice crystals. Begin by combining the chilled whole milk and granulated sugar in a bowl, beating until the sugar has completely dissolved.
- Then, gently stir in the chilled heavy cream, pure vanilla extract, and a pinch of fine sea salt.
- If your mixture isn’t already cold, give it a quick chill.
- Pour this delightful liquid into a deep metal baking dish – the metal helps with even freezing.
- Place it in the freezer for about 45 minutes.
- Once it starts to firm up around the edges, remove it and stir vigorously with a fork or whisk, scraping down the sides.
- Continue this process, freezing and stirring every 30 minutes.
- Repeat for approximately 2 to 3 hours until your ice cream is beautifully creamy and thoroughly frozen.
Plastic Bag Method
- This interactive method is fantastic for involving kids and gets results quickly! First, prepare your chosen ice cream mixture (from the ‘Freeze & Stir’ ingredients list).
- Carefully pour this base into a sturdy quart-size zip-top bag.
- Make sure to squeeze out as much excess air as possible before sealing it securely.
- For extra protection against leaks, place this bag inside a second quart-size bag.
- Now, take both sealed bags and nestle them inside a larger gallon-size zip-top bag.
- Fill this outer bag generously with crushed ice and then sprinkle in a good amount of coarse salt – this is key for lowering the ice’s freezing point and chilling your ice cream!
- Seal the gallon bag tightly.
- Get ready to shake it continuously for 5 to 8 minutes. You’ll feel the mixture firming up!
- If you prefer an even firmer scoop, you can transfer it to a freezer-safe container and freeze briefly.
Food Processor or Blender Method
- For a wonderfully smooth, gelato-like texture, your food processor or high-speed blender can work wonders. Start by preparing your preferred ice cream base (again, refer to the ‘Freeze & Stir’ ingredients).
- Pour this mixture into a zip-top bag and freeze it flat until it’s completely solid.
- Once frozen, break the solid ice cream base into manageable chunks.
- Transfer these chunks to your food processor or blender and process until the mixture becomes luxuriously smooth and creamy.
- If you’re adding any delightful mix-ins, gently fold them in now.
- Finally, scoop the ice cream into an airtight container.
- Freeze until it’s perfectly set and ready to be enjoyed.
Serving and Storage Tips
Once your homemade masterpiece is ready, here are some pro tips to ensure every scoop is perfect and lasts as long as possible:
For the ultimate scoopability, allow your ice cream to soften at room temperature for about 5 to 10 minutes before serving. This brief rest helps it reach that ideal, creamy consistency.
Enhance your ice cream experience by serving it in pre-chilled bowls or cones. This simple trick helps to slow down melting, giving you more time to savor every bite.
Elevate your dessert with a flourish! Garnish your homemade ice cream with an array of tempting toppings such as vibrant fresh fruits, rich chocolate syrup, decadent caramel sauce, crunchy nuts, or a dollop of fluffy whipped cream.
To maintain its pristine quality, always store your ice cream in an airtight, freezer-safe container. This prevents freezer burn and keeps unwanted odors at bay.
A crucial step for minimizing ice crystal formation and preserving that silky-smooth texture is to press a layer of plastic wrap directly onto the surface of the ice cream before sealing the container. This creates a barrier against air.
For peak flavor and ideal texture, aim to enjoy your homemade ice cream within two weeks of freezing. While it can last longer, these first two weeks are when it truly shines.
To preserve its quality and prevent textural degradation, avoid the cycle of repeated thawing and refreezing your ice cream. Consistency is key for a delightful dessert experience.
Variations
1. Chocolate Ice Cream
For a deep, decadent treat, simply blend in 1/3 cup of unsweetened cocoa powder and fold in your favorite chocolate chips.
2. Strawberry Ice Cream
Achieve a burst of fruity flavor by folding in fresh chopped strawberries or a smooth strawberry puree.
Create this beloved classic by stirring in plenty of crushed chocolate sandwich cookies just before freezing.
4. Mint Chocolate Chip
Infuse your ice cream with refreshing peppermint extract and generously mix in mini chocolate chips.
5. Salted Caramel
Swirl rich caramel sauce throughout the mixture and finish with a delicate sprinkle of flaky sea salt for a perfect balance.
6. Coffee Ice Cream
For a sophisticated kick, dissolve instant espresso powder directly into your ice cream base before the freezing process begins.
7. Peanut Butter Swirl
Indulge in nutty goodness by folding luscious ribbons of creamy peanut butter throughout your ice cream mixture.
8. Birthday Cake
Celebrate any day with colorful sprinkles and a dash of cake batter flavoring for a truly festive and fun treat.
9. Lemon Cheesecake
Combine softened cream cheese, bright lemon zest, and crunchy crushed graham crackers for a tangy, creamy delight.
10. Coconut Ice Cream
Transport your taste buds with aromatic coconut extract and a generous addition of shredded toasted coconut.
11. Raspberry White Chocolate
Craft an elegant dessert by folding in sweet raspberry preserves and delightful white chocolate chunks.
12. Brownie Fudge
For the ultimate chocolate indulgence, mix in chewy brownie pieces and swirl through decadent ribbons of hot fudge sauce.
13. Banana Split
Recreate this classic sundae by adding sliced bananas, bright cherries, rich chocolate chunks, and crunchy chopped peanuts.
14. Pistachio
Achieve a nutty, earthy flavor by stirring in finely chopped roasted pistachios and a hint of almond extract.
15. Pumpkin Spice
Embrace the flavors of autumn by blending in smooth pumpkin puree with a fragrant mix of cinnamon, nutmeg, ginger, and cloves.
FAQs
1. Can I make this without heavy cream?
While heavy cream is highly recommended for achieving that signature rich, velvety texture, you can certainly experiment with full-fat coconut cream as a dairy-free alternative. Just be sure it’s well-chilled!
2. How long does homemade ice cream last?
For optimal freshness, flavor, and texture, your homemade ice cream will stay delightful for about two weeks when stored correctly in an airtight container.
3. Why is my ice cream icy?
Icy textures often result from ice crystals forming when the ice cream mixture isn’t properly sealed, allowing air exposure, or if the base contains too much water. Ensuring a tight seal is crucial!
4. Can I reduce the sugar?
Yes, you can adjust the sugar content to your preference. However, be aware that reducing sugar may impact the final texture and softness of the ice cream, potentially making it firmer.
5. Can I add fresh fruit?
Absolutely! Fresh fruit is a wonderful addition. For the best results and to prevent excess moisture, gently pat the fruit dry before folding it into your ice cream mixture.
Can I substitute vanilla extract? Absolutely! While vanilla adds a classic touch, feel free to swap it for other flavor extracts like almond, peppermint, coconut, or any other essence that sparks your culinary imagination.
7. Can I use frozen fruit?
Yes, frozen fruit can be used! For the best consistency in your ice cream, it’s advisable to thaw and thoroughly drain the fruit first to remove any excess liquid.
8. Can I make dairy-free ice cream?
Indeed! To create a delicious dairy-free version, simply substitute heavy cream with full-fat coconut cream and use a dairy-free sweetened condensed milk alternative.
9. How do I make the ice cream softer?
To achieve a softer consistency, try adding a tablespoon of corn syrup to your mixture. For adult-only versions, a small amount of alcohol, such as vodka or coffee liqueur, can also help prevent it from freezing too solid.
10. Can kids help make this recipe?
Without a doubt! The plastic bag method is an especially engaging and fun kitchen activity that children can safely participate in, always with appropriate adult supervision.
Making incredible homemade ice cream without a machine isn’t just a kitchen hack; it’s a delightful culinary adventure accessible to everyone. With these straightforward methods, you’re empowered to create perfectly creamy, frozen desserts with minimal fuss and equipment. Embrace the joy of customization, crafting everything from timeless vanilla and luxurious chocolate to vibrant fruity concoctions or your own unique, imaginative mix-ins. Each batch becomes a personalized treat, ideal for sharing with family, delighting friends, or celebrating any special moment.