Unlock the Unique Aroma: Your Guide to Growing Anise at Home
Imagine this: guests arrive, and as you chat, they can’t help but comment on the delightful aroma wafting from your kitchen. You smile, knowing that unique scent comes from your very own potted anise plant. Many home gardeners, however, struggle with plants that don’t thrive, seeds that refuse to sprout, and leaves that wither away. But there’s a simple secret that can change all that… and we’ll reveal it at the end of this article.
🌱 Choosing the Right Pot and Anise Seeds
Starting strong means selecting the perfect container and the freshest seeds. Your pot needs excellent drainage and ample space for root development.
- Essential Tip: Opt for pots 20-25 cm (8-10 inches) in diameter for a robust plant.
- Always choose fresh seeds; old ones often fail to germinate.
- Use light soil, rich in organic matter, with a neutral pH.
Quick Suggestion: Mix garden soil with compost to boost nutrition from day one.
💧 Watering and Ideal Location
Anise thrives on balance: neither too much nor too little water. Overwatering is a common mistake that can lead to root rot.
- Practical Guide: Water only when the soil feels dry to the touch.
- Avoid letting water pool in the pot.
- Your plant needs direct sunlight, at least 4-5 hours daily.
Pro Tip: If growing indoors, place your pot near a south-facing window for maximum light exposure.
🌿 Germination and Initial Care
Germinating anise isn’t complicated, but it does require patience and attention. Under optimal conditions, seeds typically sprout in 10 to 14 days.
- Key Steps: Lightly moisten the soil without waterlogging it.
- Maintain a temperature between 20-25°C (68-77°F) to encourage germination.
- Avoid moving the pot frequently; anise roots are delicate.
Little-Known Fact: Covering the pot with a clear plastic film can help maintain humidity and accelerate germination.
🌸 Care During Growth
Once your seedlings emerge, it’s time to nurture their development with light pruning, fertilization, and pest control.
- Practical Checklist: Fertilize with compost every 3-4 weeks.
- Prune any dry or damaged leaves to encourage new growth.
- Regularly check for aphids or mealybugs and remove them manually if spotted.
Expert Advice: A gentle spray of water mixed with a little mild soap can effectively eliminate pests without harming your plant.
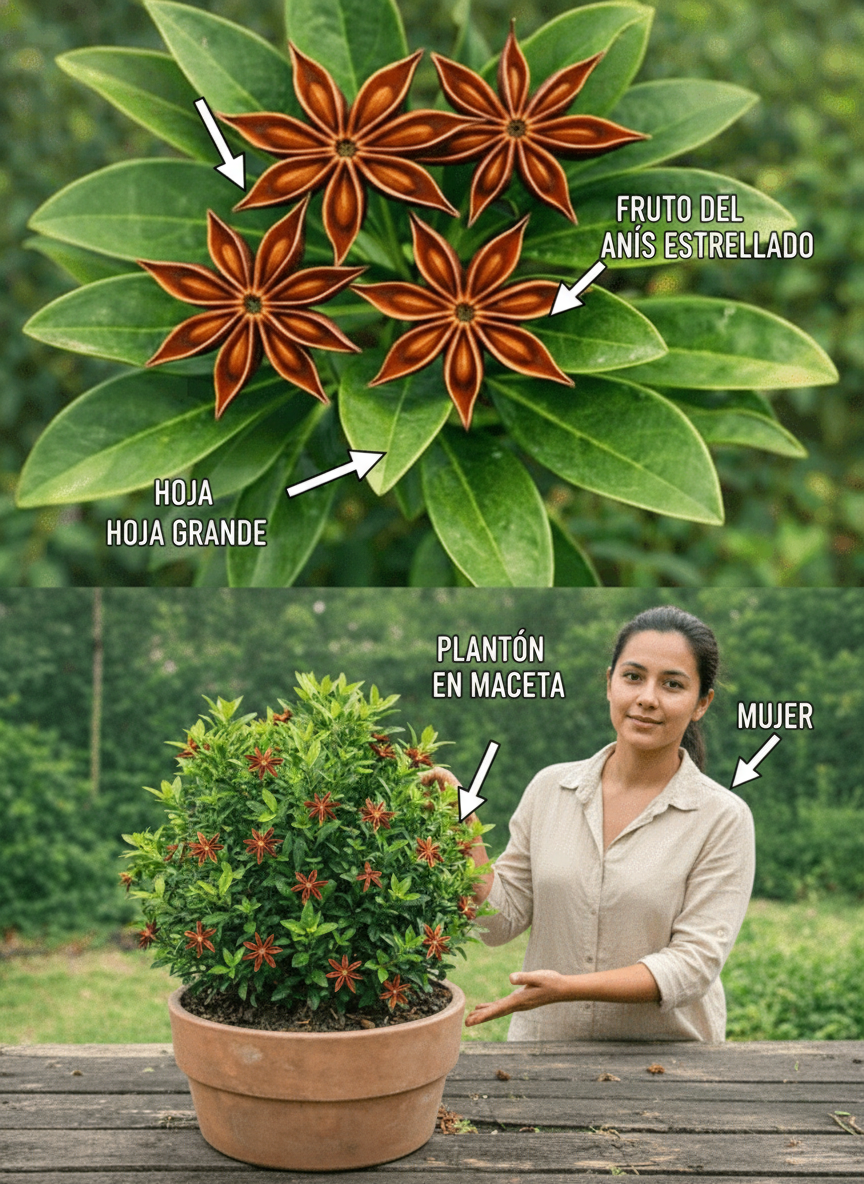
🌾 Harvesting and Using Anise
The most exciting part: enjoying the fruits of your labor! Anise fruits are easily recognized by their distinctive star shape and aromatic scent.
- Harvest Recommendations: Wait until the fruits dry on the plant before collecting them.
- Store harvested fruits in airtight jars to preserve their aroma.
- Use dried fruits in teas, desserts, or as fragrant decoration.
Note: Fresh anise fruits should not be stored for long as they quickly lose their aroma.
📋 Comparative Table: Watering vs. Sun Exposure
| Aspect | Insufficient Watering | Excessive Watering | Ideal Conditions |
|---|---|---|---|
| Leaves | Wilted | Yellowish | Green and Firm |
| Roots | Weak | Rotten | Strong and Deep |
| Flowering | Scarce | None | Abundant |
| Fruit Aroma | Weak | Mediocre | Intense and Lasting |
💡 Final Pot Cultivation Tips
- Rotate your pot weekly to ensure all leaves receive adequate light.
- Separate seedlings if they are too crowded to prevent competition.
- Keep the area around the pot clean; fallen leaves can attract fungi.
And now, for the exciting secret we promised: A tiny bit of cinnamon water applied around the soil can enhance the anise’s aroma and protect your plant from fungal issues!
❓ Frequently Asked Questions (FAQ)
- Can I grow anise indoors? Yes, provided it receives sufficient direct light and good air circulation.
- How long does it take to bear fruit? Generally 4-6 months from germination, depending on light and watering conditions.
- Is it necessary to use chemical fertilizers? No, compost or organic fertilizers are sufficient and safer for consumption.
Disclaimer: This guide is for informational and gardening purposes only. It does not substitute professional medical or nutritional advice.