 By admin
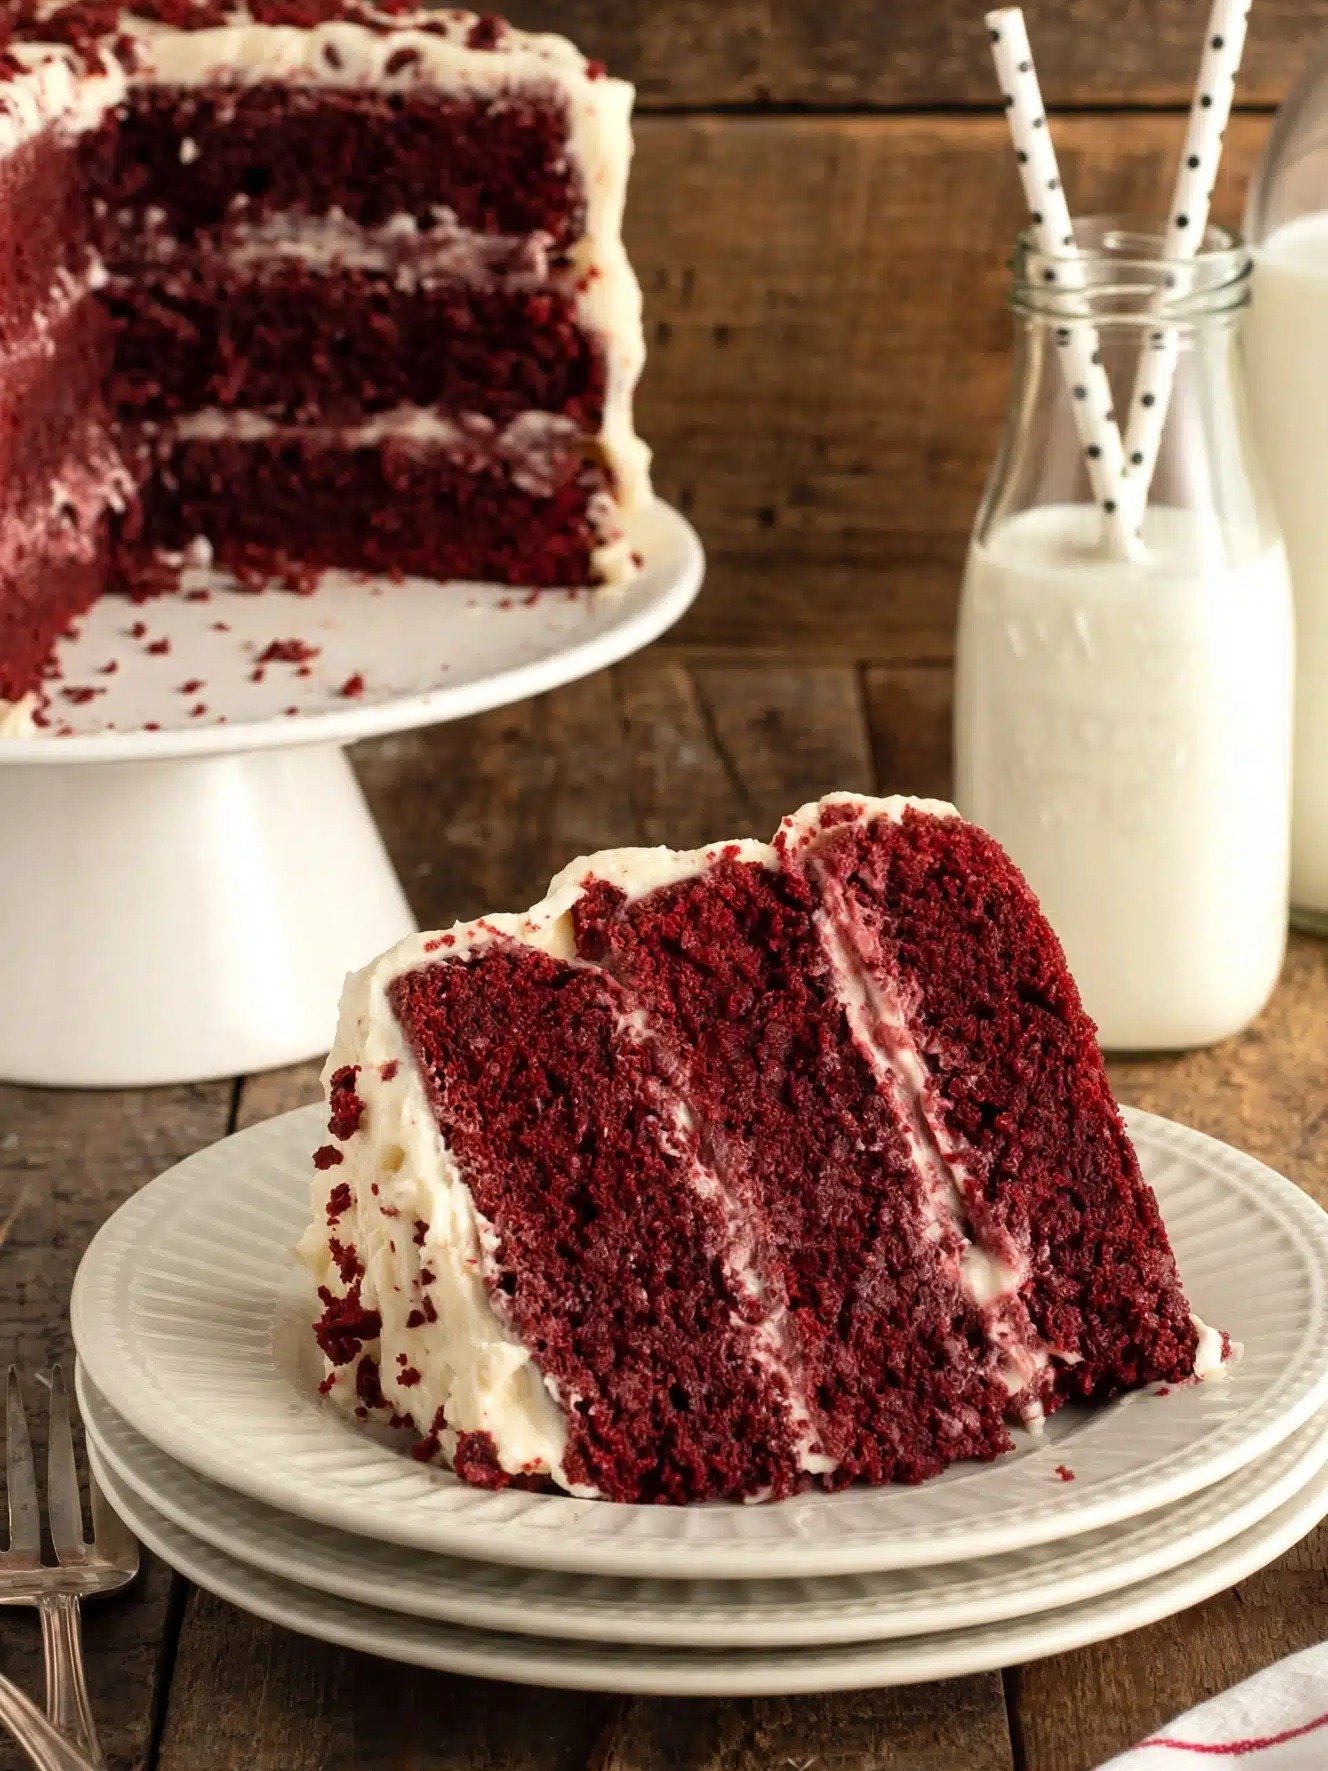
 Ever wondered what makes a Red Velvet Cake truly unforgettable? Get ready to discover the magic! This isn’t just any Red Velvet Cake; it’s an absolute showstopper – incredibly soft, perfectly moist, decadently rich, and boasting that iconic vibrant red hue, all crowned with a velvety smooth cream cheese frosting. We’ve supercharged every single bite with a special blend of cocoa and chocolate pudding, ensuring a texture and flavor profile that will leave everyone speechless.
Gather Your Essentials: The Ingredients
To create this magnificent cake, you’ll need the following components:
For the Cake:
- 2 cups all-purpose flour
- 1/2 cup unsweetened cocoa powder
- 1/4 cup instant chocolate pudding mix
- 1 teaspoon baking soda
- 1/2 teaspoon salt
- 1 cup unsalted butter, softened
- 2 cups granulated sugar
- 3 large eggs
- 1 cup sour cream
- 1/2 cup whole milk
- 1 teaspoon vanilla extract
- 1 (1-ounce) bottle red food coloring
For the Frosting:
- 1 (8-ounce) package cream cheese, softened
- 1/2 cup unsalted butter, softened
- 1/2 teaspoon vanilla extract
- 6 cups powdered sugar
- 2–4 tablespoons whole milk, as needed
Step-by-Step Guide to Baking Perfection
- Begin by preheating your oven to 350°F (175°C) to ensure it’s perfectly ready.
- Carefully prepare your chosen baking vessels: thoroughly grease and flour three 8-inch round cake pans, two 9-inch round pans, or a single 9×13-inch baking dish. This prevents sticking and ensures easy release.
- In a medium bowl, combine the all-purpose flour, unsweetened cocoa powder, instant chocolate pudding mix, baking soda, and salt. Whisk these dry ingredients together until they are well blended.
- In a separate large mixing bowl, cream together the softened unsalted butter and granulated sugar using an electric mixer until the mixture becomes wonderfully light and fluffy.
- Incorporate the eggs one by one, ensuring each egg is fully mixed into the batter before adding the next, creating a smooth consistency.
- Next, gently fold in the sour cream, whole milk, vanilla extract, and the vibrant red food coloring. Continue mixing until all these wet ingredients are thoroughly combined and the color is evenly distributed.
- Gradually add your pre-mixed dry ingredients to the wet mixture. Mix on low speed, just until everything is incorporated and no streaks of flour remain, being careful not to overmix.
- Evenly distribute the beautiful red batter among your prepared cake pans.
- Bake for approximately 35–40 minutes. You’ll know they’re ready when a toothpick inserted into the center of a cake comes out clean.
- Allow the baked cakes to cool in their pans for about 20 minutes. After this initial cooling, carefully invert them onto a wire rack to cool completely before frosting.
- Now, for the star frosting: in a clean mixing bowl, beat together the softened cream cheese and softened unsalted butter until the mixture is perfectly creamy and smooth.
- Add the vanilla extract, then gradually incorporate the powdered sugar, beating until the frosting is smooth and wonderfully fluffy. If the frosting appears too thick, add whole milk, one tablespoon at a time, until it reaches your desired consistency.
- If your cake layers have domed tops, use a serrated knife to level them, creating flat surfaces for easy stacking. Don’t discard those delicious cake crumbs – reserve them for a beautiful decorative touch later!
- Place your first cooled cake layer onto your chosen serving plate or cake stand. Spread a generous, even layer of the heavenly cream cheese frosting over the top.
- Carefully repeat this process with the remaining cake layers, stacking them neatly.
- Apply a very thin layer of frosting all over the entire cake – this is your “crumb coat,” designed to trap any loose crumbs. Chill the cake in the refrigerator for about 15 minutes to set this coat.
- Once the crumb coat is firm, apply the remaining cream cheese frosting generously over the entire cake, smoothing it out for a professional finish.
- Finally, for that iconic Red Velvet look, decorate your masterpiece with the reserved red velvet cake crumbs.
Mastering the Art of Serving & Storage
To ensure every slice of your Red Velvet Cake is enjoyed at its absolute best, follow these expert tips:
- For an optimal taste experience, serve this delightful cake either slightly chilled or at a comfortable cool room temperature.
- Due to the delectable cream cheese frosting, any leftover cake must be promptly refrigerated to maintain its freshness and safety.
- Properly covered, your cake will remain wonderfully fresh when stored in the refrigerator for up to 4–5 days.
- If serving a refrigerated cake, allow it to sit at room temperature for 15–30 minutes before cutting. This brings out the best in its texture and flavor.
- For long-term enjoyment, individual slices can be tightly wrapped and frozen for an impressive 2–3 months.
- When ready to indulge in a frozen slice, simply transfer it to the refrigerator to thaw overnight for perfect readiness.
Unleash Your Creativity: Exciting Red Velvet Variations
While our classic recipe is pure perfection, don’t hesitate to experiment! Here are some incredible ways to customize your Red Velvet masterpiece:
- Classic Layered Red Velvet: Embrace tradition by using three 8-inch cake pans and building sky-high layers, each generously slathered with that irresistible cream cheese frosting, perfect for any celebration.
- Red Velvet Cupcakes: Transform your cake batter into delightful individual treats! Simply divide it among lined muffin cups, bake until a toothpick emerges clean, and finish with a beautiful swirl of cream cheese frosting.
- Rich Chocolate Red Velvet Cake: For those who crave an even deeper chocolate experience, incorporate a touch more cocoa powder into the batter. You’ll achieve a richer chocolate flavor without losing that iconic red hue.
- Elegant White Chocolate Red Velvet: Elevate your cake by folding finely chopped white chocolate pieces directly into the batter. Garnish the frosted cake with delicate white chocolate shavings for a sophisticated touch.
- Decadent Red Velvet Oreo Cake: Crush your favorite chocolate sandwich cookies and sprinkle them generously between the cake layers or over the creamy frosting for an added crunch and flavor burst.
- Chocoholic’s Dream: Chocolate Chip Red Velvet: Introduce delightful pockets of melted chocolate by stirring semi-sweet or dark chocolate chips directly into your vibrant red batter.
- Festive Peppermint Red Velvet: Infuse your frosting with a hint of holiday magic by adding a small amount of peppermint extract. Decorate with crushed peppermint candies for a truly festive creation.
- The Ultimate Indulgence: Red Velvet Cheesecake Cake: Take your dessert to the next level by incorporating a thin, creamy cheesecake layer right between your red velvet cake layers – a truly rich and unforgettable treat.
- Fruity Strawberry Red Velvet: Add a burst of fruity sweetness by spreading a thin layer of luscious strawberry preserves between the cake layers before adding the frosting.
- Bold Red Velvet with Chocolate Frosting: For a profound chocolate experience, swap out the classic cream cheese frosting for a velvety smooth chocolate buttercream.
- Crunchy Nutty Red Velvet: Introduce a delightful textural contrast by adding chopped pecans or walnuts between the layers and sprinkle extra nuts over the finished cake for a rustic appeal.
- Tropical Coconut Red Velvet: Add a hint of the tropics by folding shredded coconut into the cake batter. Garnish the frosted cake with beautifully toasted coconut flakes.
- Charming Mini Red Velvet Cakes: Perfect for parties and individual servings, bake the batter in smaller cake pans and create adorable, perfectly portioned layered cakes.
- Effortless Red Velvet Sheet Cake: For an easy yet impressive dessert, bake the entire batter in a 9×13-inch pan and simply spread the cream cheese frosting directly over the cooled cake.
- Stunning Red Velvet Cake Trifle: Transform your cooled cake into a show-stopping trifle! Cut it into elegant cubes and layer them with rich cream cheese frosting and fluffy whipped cream in a beautiful glass trifle dish.
Your Burning Questions Answered: Red Velvet FAQs
Got a question about mastering your Red Velvet Cake? We’ve got the answers to help you bake with confidence!
1. Why isn’t my red velvet cake as vibrantly red as I expected?
The intensity of your cake’s red hue largely depends on the specific type and quantity of food coloring you use. For that truly striking, deep red, we highly recommend opting for a high-quality red gel or a concentrated liquid food coloring.
2. Is it possible to bake this cake successfully without the instant chocolate pudding mix?
Absolutely! While the pudding mix is a fantastic secret ingredient that boosts both moisture and the subtle chocolate flavor, you can certainly omit it if you don’t have it on hand. The cake will still be delicious.
3. Can I substitute buttermilk for whole milk in this recipe?
Yes, you certainly can! Buttermilk is an excellent alternative that not only adds a delightful tanginess to the cake but also contributes to an incredibly tender crumb, enhancing the overall texture.
4. Why does Red Velvet Cake traditionally include cocoa powder?
The small amount of cocoa powder in red velvet cake is crucial. It provides that characteristic subtle chocolate flavor, which is a signature element of red velvet, differentiating it from a classic vanilla or a full-bodied chocolate cake.
5. Can I prepare this delicious cake in advance?
Yes, planning ahead is a great idea! The cake layers can be baked a full day before assembly. Just ensure they are tightly wrapped and stored at room temperature until you’re ready to frost and build your masterpiece.
6. Is it possible to freeze Red Velvet Cake for later enjoyment?
Indeed! Red velvet cake freezes beautifully. For best results, tightly wrap individual slices or unfrosted cake layers in plastic wrap and then foil, and they’ll keep well in the freezer for up to 2–3 months.
7. What’s the best way to prevent my cake layers from sticking to the pans?
The key to easy release is thorough pan preparation. Make sure to generously grease and flour your cake pans, or for an extra layer of assurance, line the bottoms with parchment paper before pouring in the batter.
8. My cream cheese frosting turned out too soft – what went wrong?
A common culprit for soft frosting is ingredients that are too warm, or simply adding too much milk. If your frosting seems overly soft, pop it into the refrigerator for a brief chill before you begin spreading it.
9. Can I use gel food coloring?
Yes, gel food coloring is an excellent choice, and often preferred! It delivers a much stronger, more concentrated color without adding excess liquid to your delicate cake batter, ensuring perfect consistency.
10. What’s the trick to getting perfectly clean, neat slices of cake?
For picture-perfect slices, chill the cake in the refrigerator for a bit before you cut into it. Always use a sharp, thin knife, and remember to wipe the blade clean with a warm, damp cloth between each slice to prevent crumbs from sticking.
There you have it – your guide to creating a Red Velvet Cake that isn’t just a dessert, but an experience. This stunning and utterly indulgent treat is destined to be the star of any occasion, whether it’s a birthday, holiday gathering, intimate party, or grand celebration. With its perfectly moist, subtly chocolate-kissed cake layers and that irresistible, creamy frosting, this is truly a dessert that promises to captivate hearts and delight every palate.