 By admin
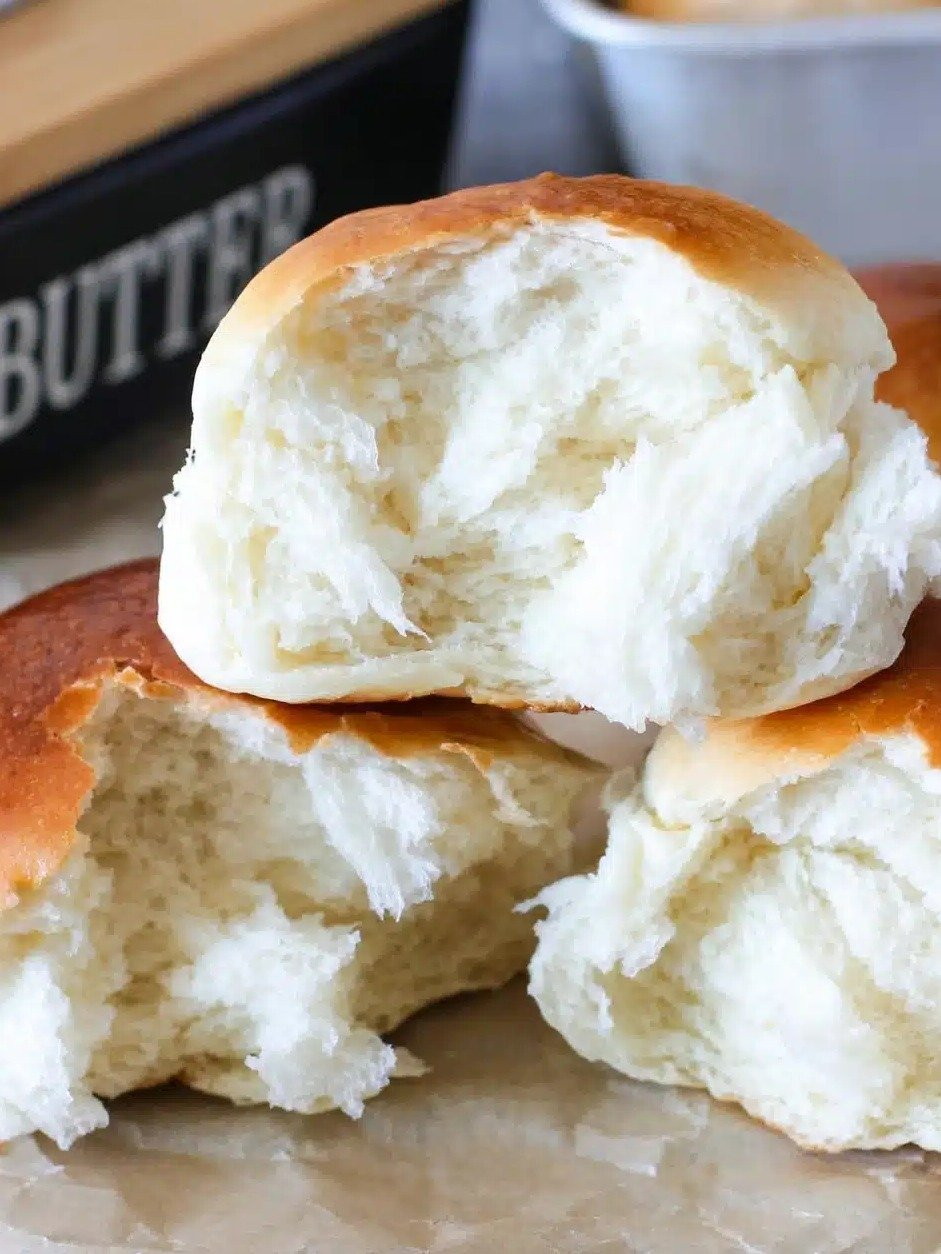
 What if you could bake sweet buns so incredibly soft, so pillowy fluffy, and so perfectly golden that they taste like they came straight from a gourmet bakery, but with minimal effort right in your own kitchen? Get ready to unlock the secret to these irresistible delights! These versatile sweet buns are not just a treat for your taste buds; they’re incredibly simple to customize, making them ideal for everything from a delightful breakfast or a quick snack to elegant dinner rolls or even luscious sweet-filled breads.
Ingredients
- 2¼ tsp active dry yeast
- ¼ cup warm water (105–115°F)
- ¾ cup warm milk
- 2 large eggs
- ¼ cup melted butter
- 1 tsp salt
- ½ cup sugar
- 4 cups all-purpose flour
For the Egg Wash
- 1 large egg
- 1 tbsp milk
Instructions
- Begin by adding the warm water to the bowl of your stand mixer. Carefully sprinkle the active dry yeast and one teaspoon of sugar over the water. Allow this mixture to sit undisturbed for approximately 5 minutes, or until a foamy layer appears on the surface, indicating the yeast is active.
- Next, incorporate the warm milk, eggs, salt, the remaining sugar, and the melted butter into the bowl. Stir everything together thoroughly until all the ingredients are well combined.
- Gradually add three cups of all-purpose flour, one cup at a time, ensuring you mix well after each addition to integrate it into the wet ingredients.
- Introduce another half cup of flour and continue stirring until the mixture comes together to form a noticeably sticky dough.
- Now, attach the dough hook to your stand mixer and begin kneading the dough on medium-high speed for a full 5 minutes.
- Slowly incorporate the final half cup of flour while the mixer continues to knead for an additional 7 to 10 minutes. The goal is to achieve a dough that is wonderfully smooth and elastic.
- Transfer the prepared dough to a lightly greased bowl, cover it with plastic wrap or a clean kitchen towel, and let it rise in a warm place for 1 to 1½ hours, or until its size has visibly doubled.
- Once risen, gently deflate the dough to release the air, then carefully divide it into 16 equal portions.
- Take each portion and shape it into a smooth, round ball. Arrange these dough balls neatly in a 9×13-inch baking pan that has been lined with parchment paper.
- Cover the pan once more and allow the shaped buns to undergo a second rise for another 1 to 1½ hours, until they look puffy and are touching each other.
- While the buns are on their second rise, preheat your oven to 350°F (175°C).
- In a small bowl, whisk together the large egg and one tablespoon of milk to create your egg wash. Gently brush this mixture over the tops of the risen buns.
- Bake the buns in the preheated oven for 15 to 20 minutes, or until they achieve a beautiful, light golden-brown color on top.
Serving and Storage Tips
- For an ultimate treat, serve these delightful buns warm, accompanied by a dollop of butter, a drizzle of honey, your favorite jam, or any beloved spread.
- Transform them into the perfect dinner rolls to complement hearty soups, comforting stews, or succulent roasted meats.
- Get creative by slicing them open and using them as a base for delicious breakfast sandwiches or miniature sliders.
- To maintain their freshness, store any cooled leftover buns in an airtight container at room temperature for a maximum of 3 days.
- If you need to extend their shelf life, refrigerate them in a tightly sealed container for up to 5 days.
- For long-term storage, freeze completely cooled buns in an airtight freezer bag or container for up to 3 months. Remember to thaw them at room temperature and gently warm them before serving for the best experience.
Variations
- Honey Sweet Buns: Infuse a naturally sweet flavor and achieve an even softer texture by replacing half of the granulated sugar with an equal amount of honey.
- Cinnamon Sugar Buns: Elevate your buns with a cozy spice by adding 1–2 teaspoons of ground cinnamon directly into the dough, then sprinkle the tops with a delightful cinnamon sugar mixture before baking.
- Garlic Butter Buns: For a savory twist, brush the freshly baked buns with a savory mixture of melted butter, finely minced garlic, and fresh chopped parsley.
- Cheese Buns: Incorporate a cheesy goodness by mixing shredded cheddar, mozzarella, or Parmesan cheese directly into the dough for savory, irresistible rolls.
- Raisin Buns: For a classic fruity variation, gently fold ¾ cup of plump raisins into the dough just before the first rise.
- Chocolate Buns: Indulge your sweet tooth by adding chocolate chips to the dough, creating a decadent breakfast treat or dessert.
- Orange Sweet Buns: Brighten your buns with a zesty citrus flavor by adding 1 tablespoon of fresh orange zest to the dough.
- Lemon Buns: For a refreshing and tangy flavor, incorporate fresh lemon zest and a small amount of lemon extract into the dough.
- Coconut Buns: Introduce a tropical note by mixing ½ cup of shredded coconut into the dough, and consider topping with additional coconut before baking for extra flavor and texture.
- Nutty Buns: Add a delightful crunch and rich flavor by mixing chopped pecans, walnuts, or almonds into the dough.
- Cardamom Buns: Transport your taste buds to Scandinavia by adding 1 teaspoon of ground cardamom for a wonderfully fragrant and aromatic bun.
- Apple Cinnamon Buns: Create a seasonal favorite by adding finely diced apples and a dash of cinnamon to the dough, ensuring the apple pieces are small to prevent excess moisture.
- Jalapeño Cheese Buns: For a savory and slightly spicy kick, mix finely chopped jalapeños and shredded cheese into the dough.
- Sesame-Topped Buns: Enhance the nutty flavor and add visual appeal by sprinkling sesame seeds over the egg wash before baking.
- Honey Butter Buns: Achieve a glossy, sweet finish and an extra layer of flavor by brushing freshly baked buns with a mixture of melted butter and honey.
FAQs
1. Can I make these sweet buns without a stand mixer?
Absolutely! While a stand mixer makes the process a breeze, you can certainly knead the dough by hand. Expect to work it for approximately 10 to 15 minutes until it achieves a beautifully smooth and elastic consistency.
2. Can I use instant yeast?
Certainly! Instant yeast is a fantastic alternative and can be used in the exact same quantity. The best part? You can simply incorporate it directly with your dry ingredients without the need for proofing.
3. Why is my dough sticky?
It’s completely normal for sweet dough to have a slightly sticky texture; it’s a characteristic of rich, soft doughs. Resist the urge to add excessive flour, as doing so can easily lead to dense and heavy buns instead of the light, fluffy texture you’re aiming for.
4. How do I know when the dough has risen enough?
For the first rise, you’ll know your dough is ready when it has visibly expanded and roughly doubled in its original size. This indicates the yeast has done its job perfectly!
5. Can I prepare the dough the night before?
Absolutely, preparing the dough ahead of time is a brilliant idea for convenience! After you’ve finished kneading, simply place the covered dough in the refrigerator. It will undergo a slow, cold rise overnight, developing even more flavor.
6. Why are my buns dense?
Several factors can contribute to dense buns. Common culprits include adding too much flour during mixing or kneading, not kneading the dough enough to develop its gluten structure, or failing to allow adequate time for the dough to properly rise and become airy.
7. Can I freeze sweet buns?
Yes, you can absolutely freeze your sweet buns! Once they are completely baked and cooled, place them in an airtight freezer bag or container. They’ll stay fresh and delicious in the freezer for up to 3 months.
8. Can I make smaller buns?
Certainly! For delightful mini-buns perfect for appetizers or smaller servings, simply divide your dough into 20 to 24 pieces instead of 16. Just remember to reduce the baking time slightly since they’ll be smaller.
9. Can I use salted butter?
You can definitely use salted butter! If you opt for salted butter instead of unsalted, just remember to slightly decrease the amount of additional salt called for in the recipe to maintain the perfect flavor balance.
10. What can I serve with sweet buns?
These versatile sweet buns are incredibly delicious with a myriad of accompaniments! Enjoy them simply with butter, a drizzle of honey, your favorite jam, or a dollop of cream cheese. They also make a fantastic pairing with eggs for breakfast or as a delightful sidekick to savory meals.
Ultimately, these homemade sweet buns are a testament to simple baking at its best: irresistibly soft, wonderfully fluffy, and incredibly versatile, making them suitable for virtually any meal, sweet or savory. Once you’ve mastered this fundamental dough, a world of delicious variations opens up, allowing you to get creative in the kitchen!